How to create a branch
A branch is an independent line of development.
New commits are recorded in the history for the current branch, which results in taking the source from someone’s repository (the place where the history of your work is stored) at certain point in time, and apply your own changes to it in the history of the project.
To add changes to your GitLab project, you should create a branch. You can do it in your shell or in GitLab.
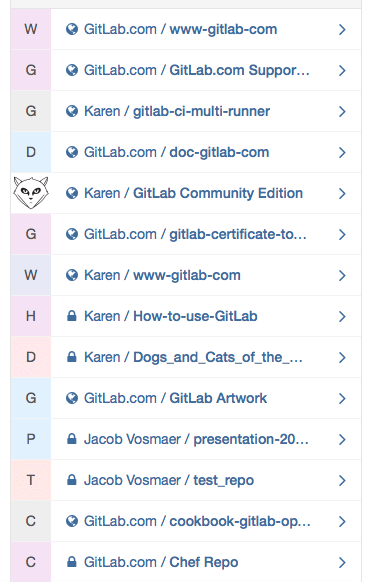
To create a new branch in GitLab, sign in and then select a project on the right side of your screen:
Click on "commits" on the menu on the left side of your screen:
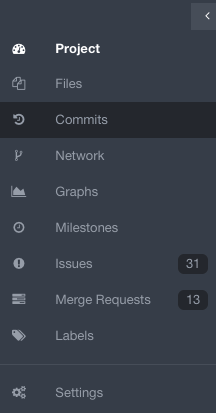
Click on the "branches" tab:

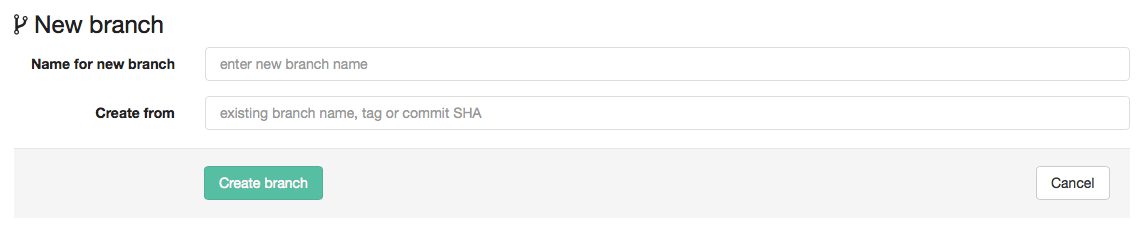
Click on the "new branch" button on the right side of the screen:

Fill out the information required:
Add a name for your new branch (you can't add spaces, so you can use hyphens or underscores)
On the "create from" space, add the the name of the branch you want to branch off from
Click on the button "create branch"
Note:
You will be able to find and select the name of your branch in the white box next to a project's name:
